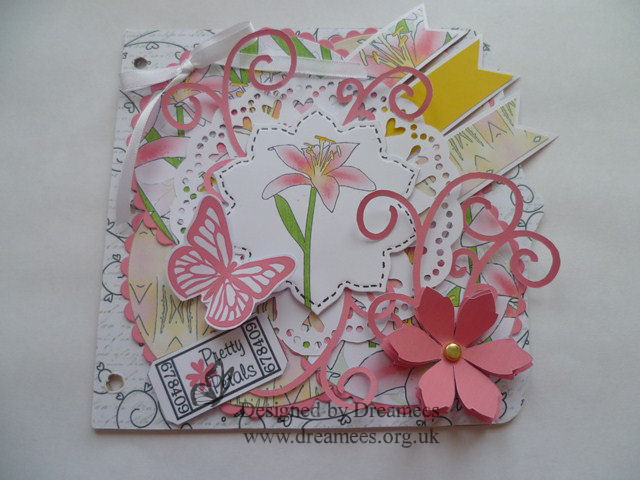
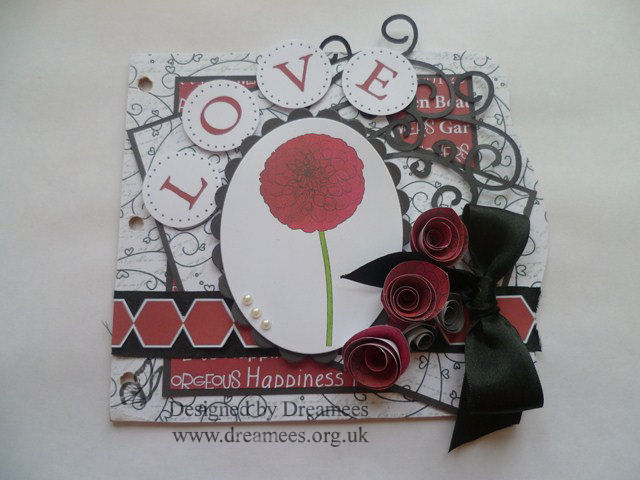
Hi there crafters, I hope you are all well. Its been quite a tough time for me this last couple of weeks , nothing wrong just not felt 100% so things have been such an effort.
On a good note I have got a lovely card to show you.
I have used Dreamees Penny Farthing stamp set ( http://www.dreamees.org.uk/penny-farthing-1030-p.asp ) I adore this stamp, it is so versatile with being able to use it for men or women.
I have also used papers from the Elegance Collection cd ( http://www.dreamees.org.uk/the-elegance-collection-cd-583-p.asp ) which is still one of Hayley favorites.
Also I have used the Hot Air Balloon Set of stamps ( http://www.dreamees.org.uk/hot-air-balloons-1037-p.asp ) in which I made flowers to decorate the card.
This card has been made in one of my fave colours Peach I just love this colour its so warm.
I hope you like this card today , also if you want to see how the flowers were made using the Hot air balloon stamps here is the link for that - http://www.youtube.com/watch?v=qYXnEcoR2RQ&list=UUbncgISsR0-11N463AwFbvg&index=2
Have a lovely weekend.
See you all very soon.
Thank you for looking.
Carol xx
Sunday, 17 March 2013
Sunday, 10 March 2013
Blooming Brights meets Pretty Pastels
Good evening, I hope you are all well.
Tonight I am showing you a card I have made today, which I am happy about because I have not made a card for a week, just not felt like it , not that I have been poorly or anything just my mojo seemed to have gone for a while lol.
This card has been made using the Blooming Brights cd, incorporating the blank flower templates from Pretty Pastels cd which enables you to use any backing paper to make your flowers to match the project you are making.
Right getting to the card , I used a blank card 14cm square, covered this with a lilac paper, then a yellow paper on top leaving a narrow border. I then cut another piece of the purple backing paper 10cm square then a yellow paper again leaving a narrow border to mount on top. Attach this to the card at an angle. I then cut a piece of the lilac paper 14cm long by 5 cm wide again matt and layer with the yellow on top, then I printed the plain Lilac paper from the cd and used a Martha Stewart punch to make a fancy edge which I attached to the paper I have just matt and layered , attached this to the card down the left hand side.
I then printed a sheet of the sentiments again from the cd cut an oval around the sentiment using a straight spellbinders oval die, then cut a scalloped oval edged with brown, another spellbinders die. Matt and layered these together as you can see in the picture attached to the main card.
I then printed the yellow and lilac backing papers I need from the blooming Brights cd, put the papers back into the printer and printed the blank flower templates from the Pretty Pastels cd , then I had the flower shapes I need in the papers I wanted to match my project.
Attached these to the bottom right hand corner of the card as shown.
I then added a yellow double bow ribbon to the top left of the card, and a last touch a rolled flower in the middle of the bow.
I just added self adhesive pearls to add a bit of detail to the middle of some of the flowers, edges of the ribbon, and on the oval sentiment.
Thank you so much for taking the time to look at my blog I would appreciate it if you would like to leave a comment.
The Dreamees products can all be purchased from www.dreamees.org.uk
Carol xx
Tonight I am showing you a card I have made today, which I am happy about because I have not made a card for a week, just not felt like it , not that I have been poorly or anything just my mojo seemed to have gone for a while lol.
This card has been made using the Blooming Brights cd, incorporating the blank flower templates from Pretty Pastels cd which enables you to use any backing paper to make your flowers to match the project you are making.
Right getting to the card , I used a blank card 14cm square, covered this with a lilac paper, then a yellow paper on top leaving a narrow border. I then cut another piece of the purple backing paper 10cm square then a yellow paper again leaving a narrow border to mount on top. Attach this to the card at an angle. I then cut a piece of the lilac paper 14cm long by 5 cm wide again matt and layer with the yellow on top, then I printed the plain Lilac paper from the cd and used a Martha Stewart punch to make a fancy edge which I attached to the paper I have just matt and layered , attached this to the card down the left hand side.
I then printed a sheet of the sentiments again from the cd cut an oval around the sentiment using a straight spellbinders oval die, then cut a scalloped oval edged with brown, another spellbinders die. Matt and layered these together as you can see in the picture attached to the main card.
I then printed the yellow and lilac backing papers I need from the blooming Brights cd, put the papers back into the printer and printed the blank flower templates from the Pretty Pastels cd , then I had the flower shapes I need in the papers I wanted to match my project.
Attached these to the bottom right hand corner of the card as shown.
I then added a yellow double bow ribbon to the top left of the card, and a last touch a rolled flower in the middle of the bow.
I just added self adhesive pearls to add a bit of detail to the middle of some of the flowers, edges of the ribbon, and on the oval sentiment.
Thank you so much for taking the time to look at my blog I would appreciate it if you would like to leave a comment.
The Dreamees products can all be purchased from www.dreamees.org.uk
Carol xx
Saturday, 23 February 2013
A little bit of pastel
Hi everyone, well it has been a bit busy here to say the least, since my last post we have been back to one of our fave venues for the shows - The National Motorcycle Museum in Birmingham - we really do adore it there, the people are so friendly and love to see Dreamees products and love the demos which Hayley treats them to, we sold out of lots of our new products at this first show for us of 2013.
Tomorrow we are heading up to Houghton Le Spring near Sunderland for the Ross Papercraft Show, we are excited about this one too as we havent been to this venue ( Rainton Meadows ) for a few months, we have lots of new products to show our customers up there which I am sure they will love.
Anyway today I am showing you a card I made last week - it has been made using the Pretty Pastels cd rom available at www.dreamees.org.uk
First of all I started with a 13cm square card blank.
Distressed the edges of the base card using walnut stain distress ink pad.
I then printed some backing papers from the cd , matt and layered these onto the base card,.I then cut a square and a rectangle to use as matt and layers to add interest to the base before I added the topper , in this case it was a sentiment from the cd to act as topper.
I used a Martha Stewart punch to cut edges for the square and rectangle.
I have used a spellbinders die to cut out a white flower shape, then the size smaller of the same die over the sentiment which I wanted to use from the cd. I then distressed these pieces with walnut stain again.
I added the square and rectangle to the base card as you can see in the pictures.
I then cut various flowers from the cd in the colours Brown and Teal, to make the display in the bottom left hand corner. I also cut some leaves out from out Cuttables range of cds which are aimed at people with computer cutting machines like the craft robo and cameo as these cds use gsd files.
I then did a stitching effect around the large spellbinders shape just to give more interest.
Putting everything in place I used double sided tape and sticky pads to raise certain aspects to give texture too.
I then cut 3 small pieces of ribbon and just stuck them unde the shaped edge under the square shape.
then just adding peals to the points of the flower shap die cut, and the centres of the flowers.
The card is now complete on the front.
For the inside I made a simple tag covered it again with papers from the cd added a bit of ribbon too.
I then covered the inside of the card by matt and layer with two backing papers, made a strip across the inside of the card to slide the tag into.
The card is now complete.
Thank you for taking the time to have a look at this project.
Carol xx
Wednesday, 6 February 2013
A little template card
Here is a little template card I have made, its so versatile and you can decorate it as much or as little as you want, you can also use it for any occassion.
The template I used is called the Triangle Fold Template, I also used the papers and flowers from the cd rom called Pretty Pastels both available from www.dreamees.org.uk
First I cut out the template using black card for the base card, then I cut around the matt and layer pieces in the template onto the paper I choose from the cd rom, I also printed and cut all the flowers leaving a white narrow border on each one I needed to decorate the card, then I arranged all the flowers off setting them to make them look a nice little arrangment.I used some swirls I had cut out previously from the Dreamees Cuttables range of cd roms for the Silhouette and craft robo, because these cds have gsd files on.
I then added stick on pearls for extra detail.
Thank you for looking I would appreciate it if you could leave a comment too, thanks so much.
Carol xx
The template I used is called the Triangle Fold Template, I also used the papers and flowers from the cd rom called Pretty Pastels both available from www.dreamees.org.uk
First I cut out the template using black card for the base card, then I cut around the matt and layer pieces in the template onto the paper I choose from the cd rom, I also printed and cut all the flowers leaving a white narrow border on each one I needed to decorate the card, then I arranged all the flowers off setting them to make them look a nice little arrangment.I used some swirls I had cut out previously from the Dreamees Cuttables range of cd roms for the Silhouette and craft robo, because these cds have gsd files on.
I then added stick on pearls for extra detail.
Thank you for looking I would appreciate it if you could leave a comment too, thanks so much.
Carol xx
Wednesday, 23 January 2013
Dreamees meet mdf
Hi Everyone
I hope you are all well , keeping safe and warm. It has been terrible in Nottinghamshire where we live, with all this snow, I know we are not the only ones so I hope you are all ok. Unfortunatelywe didnt make the papercraft show last Sunday in Hull due to the weather conditions, our next show at the NMM in Birmingham will be the first for us this year.
Anyway I havent been sitting doing nothing in this bad weather - YES - I have been crafting with our new cds called Blooming Brights and Pretty Pastels and they are beautiful even if I do say so myself.
Hayley actually let me get my hands on one of her MDF book blanks, well I think I have got the bug on wanting to decorate more .
It has kept me amused for a couple of days working on this but I am sure when you see the results you will love it as much as I do.
You can find the cds and lots more products at www,dreamees,org,uk
Here are the pictures of all the pages then the book put together.
Thanks for taking the time to read this and if you leave a comment thank you so much.
Carol x
I hope you are all well , keeping safe and warm. It has been terrible in Nottinghamshire where we live, with all this snow, I know we are not the only ones so I hope you are all ok. Unfortunatelywe didnt make the papercraft show last Sunday in Hull due to the weather conditions, our next show at the NMM in Birmingham will be the first for us this year.
Anyway I havent been sitting doing nothing in this bad weather - YES - I have been crafting with our new cds called Blooming Brights and Pretty Pastels and they are beautiful even if I do say so myself.
Hayley actually let me get my hands on one of her MDF book blanks, well I think I have got the bug on wanting to decorate more .
It has kept me amused for a couple of days working on this but I am sure when you see the results you will love it as much as I do.
You can find the cds and lots more products at www,dreamees,org,uk
Here are the pictures of all the pages then the book put together.
Thanks for taking the time to read this and if you leave a comment thank you so much.
Carol x
Wednesday, 9 January 2013
Fiery Lace
Good Evening Crafters. I hope you are all well. Tonight I have another card for you to see, I wasnt sure how this one was going to end up, but I must say I do like it in the end.
I have used Dreamees Fiery Flower Stamp
Backing papers from Dreamees Back to Basics Cd
Swirls cut from Dreamees Cuttables range cds ( These cds are GSD files to use with cutting machines )
Walnut Stain Distress Ink Pad
Lace from my stash
I stamped the fiery flower out 10 times onto cream paper using the walnut stain ink pad.
Printed out backing papers from the cd in pink, pink stripe onto cream paper, and cream paper from my stash.
I then matt and layered the papers leaving a narrow border.
I then cut a piece of the pink paper 10 cm square to make the topper, matt and layered again as you can see in the photo.
Before sticking this to the base card I run an edge of double sided tape to the reverse , in which I pleated the cream cotton lace. I then used foam tape to attach the topper to the base card.
Then I attached the swirls.
Pulled up the petals on all the flowers attached 1 to each corner of the card, the flowers for the topper I used two for each one again pulling up the petals and glueing two together off setting them. Making the flower look fuller.
I hope you like this card, I adore this fiery flower stamp it is so versatile.
Thank you for stopping by.
Carol xx
I have used Dreamees Fiery Flower Stamp
Backing papers from Dreamees Back to Basics Cd
Swirls cut from Dreamees Cuttables range cds ( These cds are GSD files to use with cutting machines )
Walnut Stain Distress Ink Pad
Lace from my stash
I stamped the fiery flower out 10 times onto cream paper using the walnut stain ink pad.
Printed out backing papers from the cd in pink, pink stripe onto cream paper, and cream paper from my stash.
I then matt and layered the papers leaving a narrow border.
I then cut a piece of the pink paper 10 cm square to make the topper, matt and layered again as you can see in the photo.
Before sticking this to the base card I run an edge of double sided tape to the reverse , in which I pleated the cream cotton lace. I then used foam tape to attach the topper to the base card.
Then I attached the swirls.
Pulled up the petals on all the flowers attached 1 to each corner of the card, the flowers for the topper I used two for each one again pulling up the petals and glueing two together off setting them. Making the flower look fuller.
I hope you like this card, I adore this fiery flower stamp it is so versatile.
Thank you for stopping by.
Carol xx
Wednesday, 2 January 2013
Hi there,
Happy New Year to you all.
I am here again today to show you another card I have made with Dreamees products. This card has been made using the Silhouette Butterfly Stamp Set, available at http://www.dreamees.org.uk/silhouette-butterfly-stamp-set-936-p.asp also distress markers.
First of all I distressed the edges of the base card using peeled paint distress ink pad.
I then printed a lilac backing from Dreamees Elegance Collection cd rom ( http://www.dreamees.org.uk/the-elegance-collection-cd-583-p.asp ) to which I added to the base card leaving a narrow border.
I then cut a small piece of card, and using the stems in the stamp set, used the distress markers peeled paint and dusty concord, brushed these colours straight onto the stamp, making the lovely effect as you can see on the card, I did this several times to give the effect I required.
Then mounting this topper onto another piece of card already distressed with the peeled paint ink pad. I also created a border using the same technique.
I attached the border across the base card, added the topper, attaching a small bow to the base of the stems created.
I then used some teardrop paper lace which will be on sale shortly on our web site and at shows all ready cut for you distressed again with peeled paint .
I added 3 small rolled flowers swirl and pearls just to embellish and finishe the card of.
Thank you or looking, I hope you like this card.
Carol xx
.
Happy New Year to you all.
I am here again today to show you another card I have made with Dreamees products. This card has been made using the Silhouette Butterfly Stamp Set, available at http://www.dreamees.org.uk/silhouette-butterfly-stamp-set-936-p.asp also distress markers.
First of all I distressed the edges of the base card using peeled paint distress ink pad.
I then printed a lilac backing from Dreamees Elegance Collection cd rom ( http://www.dreamees.org.uk/the-elegance-collection-cd-583-p.asp ) to which I added to the base card leaving a narrow border.
I then cut a small piece of card, and using the stems in the stamp set, used the distress markers peeled paint and dusty concord, brushed these colours straight onto the stamp, making the lovely effect as you can see on the card, I did this several times to give the effect I required.
Then mounting this topper onto another piece of card already distressed with the peeled paint ink pad. I also created a border using the same technique.
I attached the border across the base card, added the topper, attaching a small bow to the base of the stems created.
I then used some teardrop paper lace which will be on sale shortly on our web site and at shows all ready cut for you distressed again with peeled paint .
I added 3 small rolled flowers swirl and pearls just to embellish and finishe the card of.
Thank you or looking, I hope you like this card.
Carol xx
.
Subscribe to:
Posts (Atom)